🖥️ App Builder
After creating a project in AppStruct, you will be directed to your App Builder. The App Builder is the central operating environment where you can design, develop, and manage your apps. This section provides a detailed overview of the App Builder, outlining its main components and functionalities to help you efficiently navigate and utilize the AppStruct platform.
Overview
The App Builder is divided into five main sections:
- Navigation Menu
- Canvas
- Tool Bar
- Component Settings
- Styles
Each section is equipped with specific tools and features designed to streamline your app development process.
1. Navigation Menu
The Navigation Menu is located on the left side of your screen and serves as the primary navigation tool within the App Builder. It allows you to access and manage various aspects of your project effortlessly. The Navigation Menu includes seven main sections:

1.1 Add Screen & Template - Add new screens or utilize templates to kickstart your app development.
- Features:
- Add Main Templates: Select from a variety of pre-designed templates to expedite your app creation.
- AI Feature - Screen from Image: Upload a design image, and AppStruct’s AI will automatically generate corresponding screens with appropriately placed components.
1.2 Add Component - Incorporate AppStruct’s comprehensive library of components into your app.
- Subgroups:
- Menu & Navigation
- Typography
- Buttons
- Forms & Inputs
- Layouts
- Shapes
- Multimedia
- Other
1.3 Pages & Screens - Manage different device screens within your project.
- Features:
- Add Device Screen
- Copy Screen
- Rename Screen
- Assign Screen Type
1.4 Design System - manage and customize the visual style of your app. You can define global color schemes, typography settings.
- Options:
- Light Mode
- Dark Mode
1.5 AI Agent - generate fully-coded components simply by describing them in plain language. Use it to quickly prototype and add custom UI elements without writing code by hand.
1.6 Backend
- Purpose:
- Connect your app to backend services.
- Options:
- Third-Party Services: Integrate with backend services like Firebase or Supabase via API.
- AppStruct Integrated Backend: Utilize AppStruct’s built-in backend for simpler applications that do not require complex backend systems.
1.7 Publishing
- Purpose:
- Publish your app across various platforms.
- Features:
- App Store Publishing: Tools to publish your app directly to the Apple App Store.
- Google Play Publishing: Tools to publish your app directly to the Google Play Store.
- Web Publishing: Deploy your app to the web with AppStruct’s web publishing tools.
1.8 Project Settings - Configure essential project details.
- Features:
- Change Project Name
- Add Description
- Set Project Icon
2. Canvas
The Canvas is the central area where you design and layout your app’s screens. It provides a user-friendly interface for dragging and dropping components, navigating between different device screens, and adjusting the zoom level to focus on specific areas of your app.
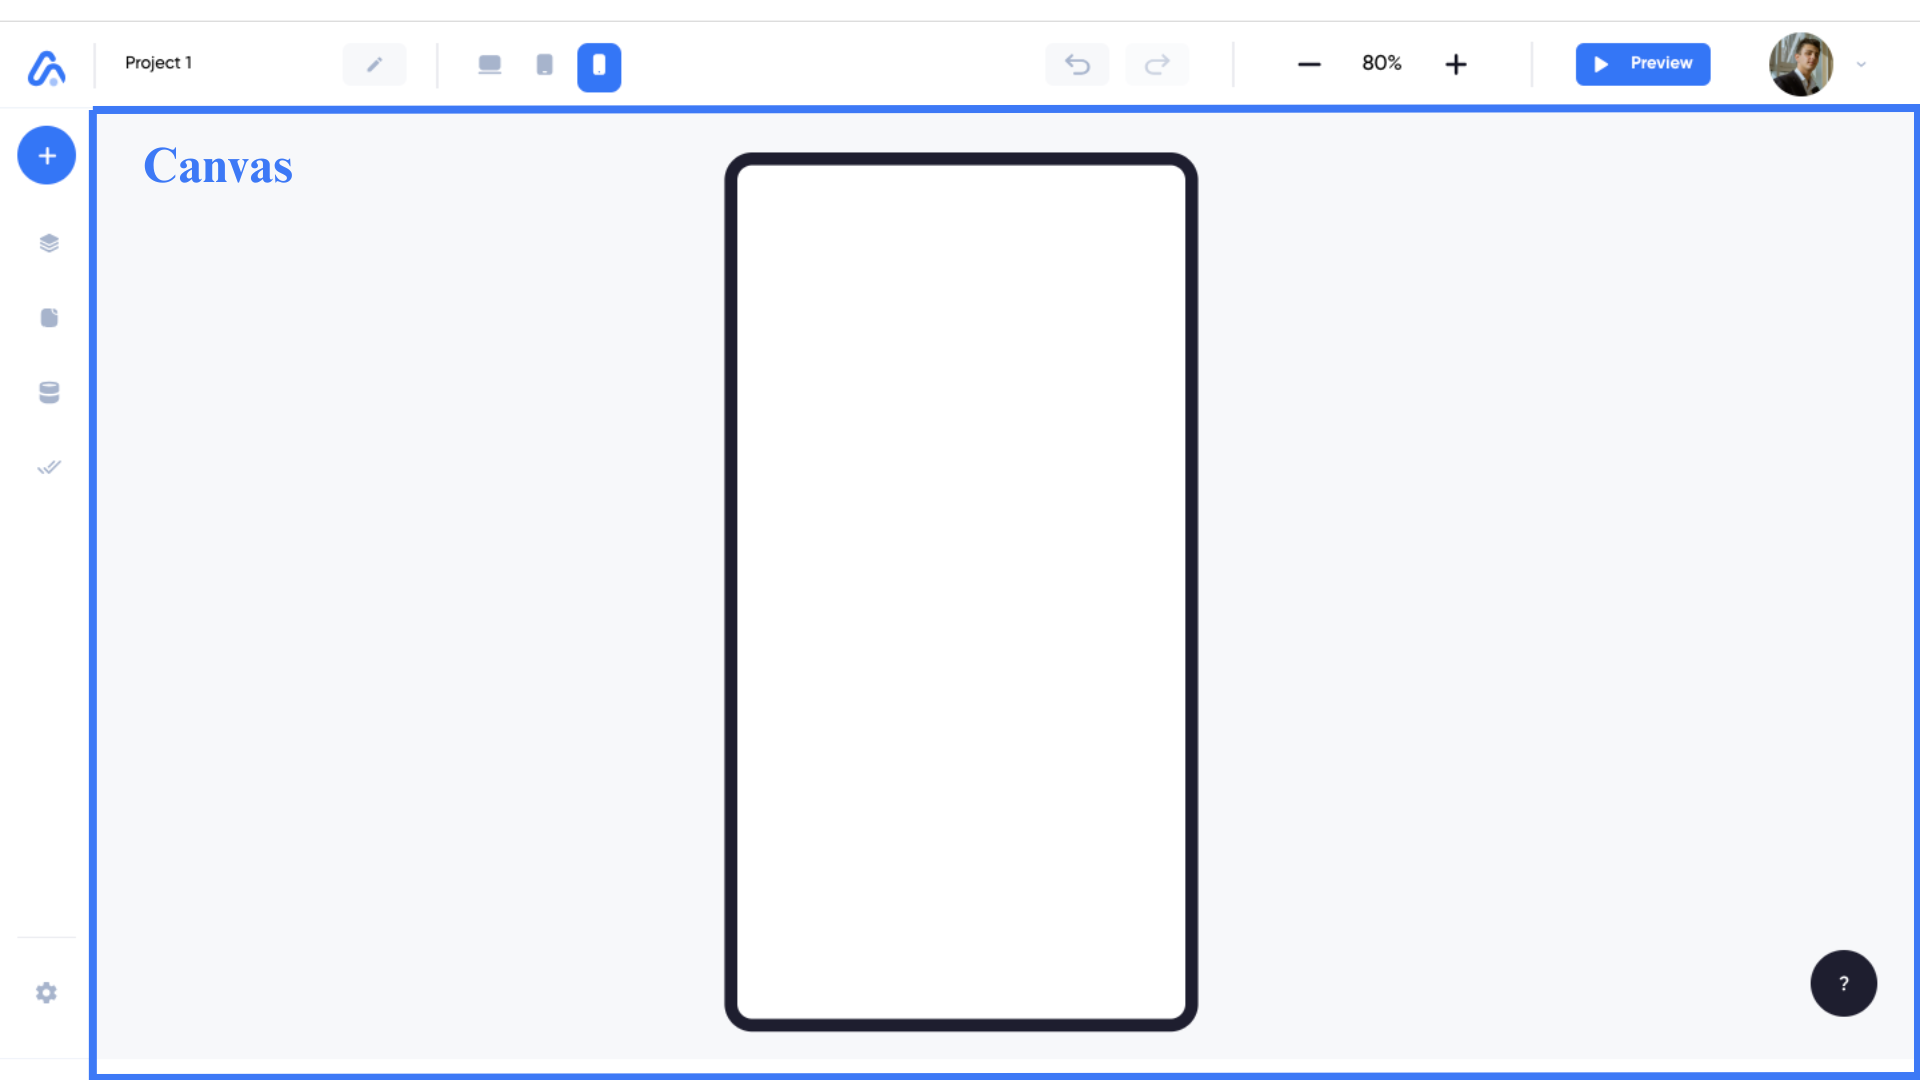
Features
- Device Navigation: Switch between mobile, tablet, and desktop views to ensure your app is responsive across different devices.
- Zoom Controls: Zoom in and out to work on details or get an overview of your app’s layout.
- Page Navigation: Easily switch between different pages and screens within your project.
3. Tool Bar
The Tool Bar is located at the top of the screen and provides quick access to essential project management and editing tools.

Features:
- Edit Project Name: Modify the name of your project directly from the toolbar.
- Change Frame Sides: Toggle between mobile, desktop, and web app views.
- Undo/Redo Changes: Revert or reapply recent changes to your project.
- Zoom In/Out: Adjust the zoom level for better visibility.
- Preview Project: Click the "Preview" button to see a live preview of your app.
- Share Project: Click the "Share" button to share your project with team members or stakeholders.
- Manage Profile: Access your profile settings by clicking on the profile icon.
4. Component Settings
The Component Settings appears within the Canvas when you drag and drop an element and click on it. It is designed to provide technical options for the selected element and consists of two main parts: Settings and Adaptive Layout.

4.1 Settings
The Settings menu allows you to modify the interactive behavior and content of elements.
Capabilities
- Change Text: Edit the text within elements.
- Change Icon: Modify icons and their positions within elements.
- Add Actions: Define actions that trigger upon user interaction.
- Upload Media: Add photos or videos to elements.
- Add Key URL: Integrate external URLs with your elements.
- Other Customizations: Additional options vary based on the selected element.
4.2 Adaptive Layout
The Adaptive Layout menu enables you to adjust the visual behavior of elements across different devices.
Capabilities
- Device Viewport Simulation: View how your app appears on mobile, tablet, or desktop devices.
- Device-Specific Styles: Apply styles tailored to specific screen sizes and platforms.
5. Styles
The Styles also appears within the Canvas when you drag and drop an element and click on it. It is tailored for customization options, allowing you to fine-tune the appearance and layout of your elements.

Features:
- Align Features: Align elements precisely within your layout.
- Resize Elements: Adjust the size of elements using percentage values or by dragging the edges.
- Modify Corners: Change the corner radius of components for rounded or sharp edges.
- Change Colors: Customize the color scheme of elements.
- Text Customization: Adjust text font, weight, size, and other typography settings.
- Add Borders: Apply borders to components with customizable thickness and color.
- Add Shadows: Enhance elements with shadow effects for depth.
- Modify Layout: Change the layout properties of elements to fit your design needs.
- Change Background: Set or modify the main background of your app.
Best Practices
- Organize Your App Builder: Regularly arrange your Navigation Menu sections and keep your Canvas organized to enhance productivity.
- Utilize Templates: Leverage AppStruct’s templates and AI features to accelerate your app development process.
- Optimize Layouts: Ensure your app’s layout is responsive by utilizing the Adaptive Layout features for different devices.
- Customize Thoughtfully: Make use of the customization tools in the Styles to maintain a consistent and appealing design across your app.
Need Assistance?
If you encounter any challenges or require further guidance while building your app, please refer to the Documentation or, contact our support team at [email protected].